Manually adding GPS to images for Mapillary using GeoSetter
Date: August 01, 2019
Mapillary is a popular platform for uploading user-created street images. The platform has varoius applications for different devices (IOS, Android). However, some people may record images on Digital Cameras, which often don’t contain GPS. The solution for that is to use custom GPS Logger and later merge data. That’s what we will do in this guide.
One of the ways to do it is to use GeoSetter - a software to merge images with GPX track and and adjust a time delay.
You can add GPX track by pushing an “open” button in Tracks tab. If you opened the folder with images, you can merge them by choosing Edit -> Syncronise with GPS Data Files.
However, time on the camera and GPS logger wouldn’t fit ideally, and different time adjustment settings (adjust time, timezone and etc.) will help to syncronise data.

After doing all the steps above the map will look like this.
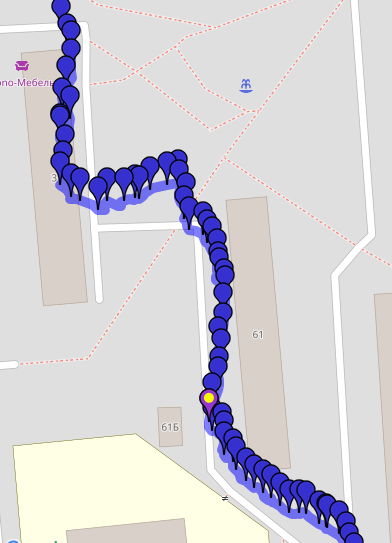
As we can see, the track isn’t ideal. Different circumstances can influence on preciseness of GPS logger, and the quality of track can be low. However, there are better ways to handle the problem rather than manual editing GPS through Goesetter or Mapillary web interface, which can be tiring for hundreds of images.
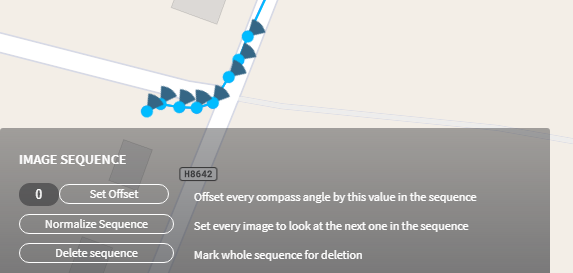
Geosetter can create a GPX track from GPS data in images. It means that after original track syncronisation we can save only files with key GPS points(Edit -> Save changes of selected images), create GPX track from it and auto-set GPS if images between images using option “Interpolate regarding shoot tIme with last or next position”.
If we look at the map now, we’ll see the difference between red (original) track and blue, edited one.
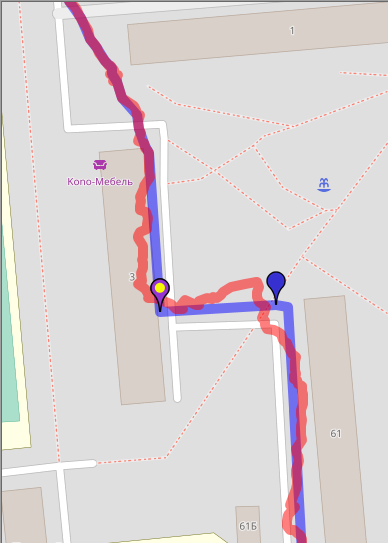
Such method can be way too complicated and excessive for good GPX files. However, if your track has sufficient inaccuracy, such trick can help to make data more valuable.